1. Press the Windows Key + R, simultaneously, type control and press OK, to open the Control Panel.
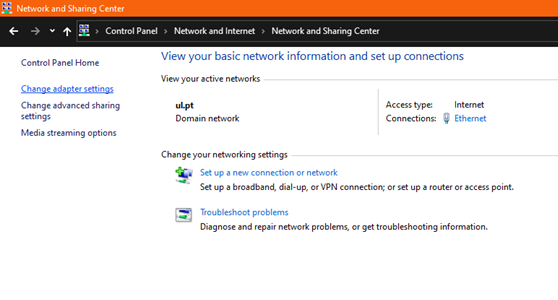
2. Select Network and Internet, go to Network and Sharing Center.

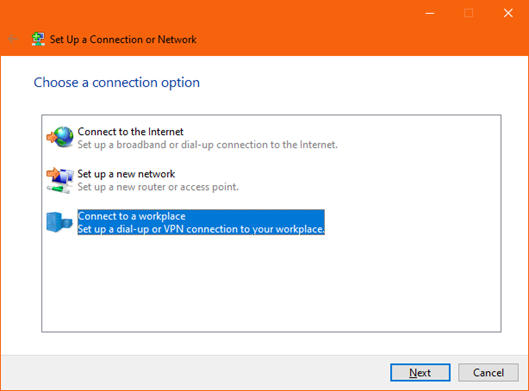
3. Choose Set up a new connection or network and then Connect to a workplace.
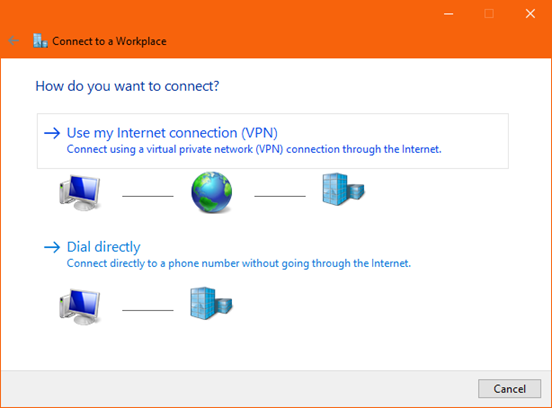
4. Choose "Use my Internet connection (VPN)".
5. Write the following
Internet address: vpn.ciencias.ulisboa.pt
Destination name: VPN FCUL IKEv2
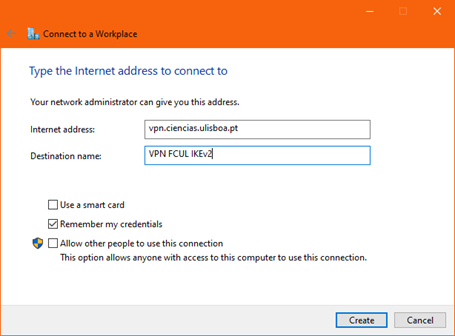
6. Choose "Create"
7. Go to "Change adapter settings"
8. Choose "Properties da VPN FCUL IKEv2."
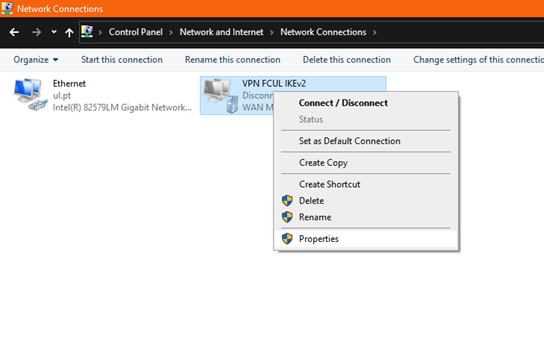
9. Go to "Security" and choose as shown in the following image:
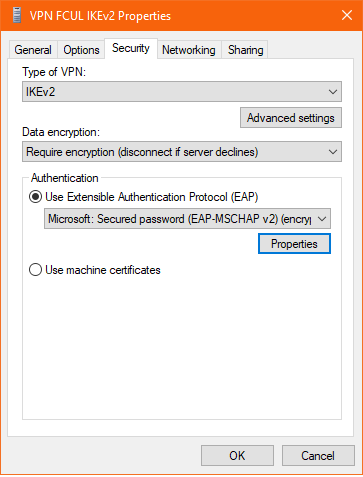
10. In Advanced settings unselect Mobility, press OK.

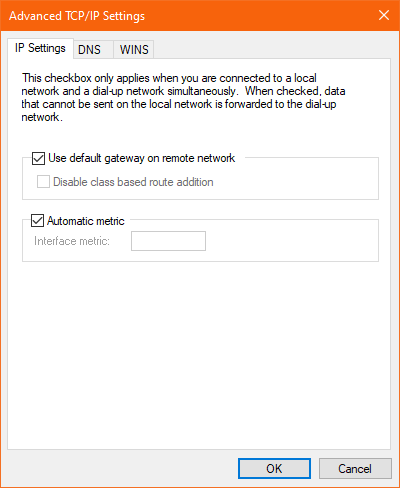
11. Go to the Network tab, select Internet Protocol Version 4 (TCP/IPv4), click on Properties, click on Advanced in the next window, and select Use default gateway on remote network. Press OK.
12. Now that the connection is properly configured, you can connect to the FCUL VPN by going to the network icon located in the bottom left corner.

13. Select the VPN you just created and press “Connect”.

14. Authenticate with your account
Student account fcXXXXX@vamos.ciencias.ulisboa.pt (XXXXX student number) and password.
Collaborator accounts ZZZZZ@ciencias.ulisboa.pt (ZZZZZ account username) and password.

